Use Live Masks in Serif's Affinity Photo editing software for balanced landscapes
Blend exposures for balanced landscapes using Live Masks in Affinity Photo and bracketed images
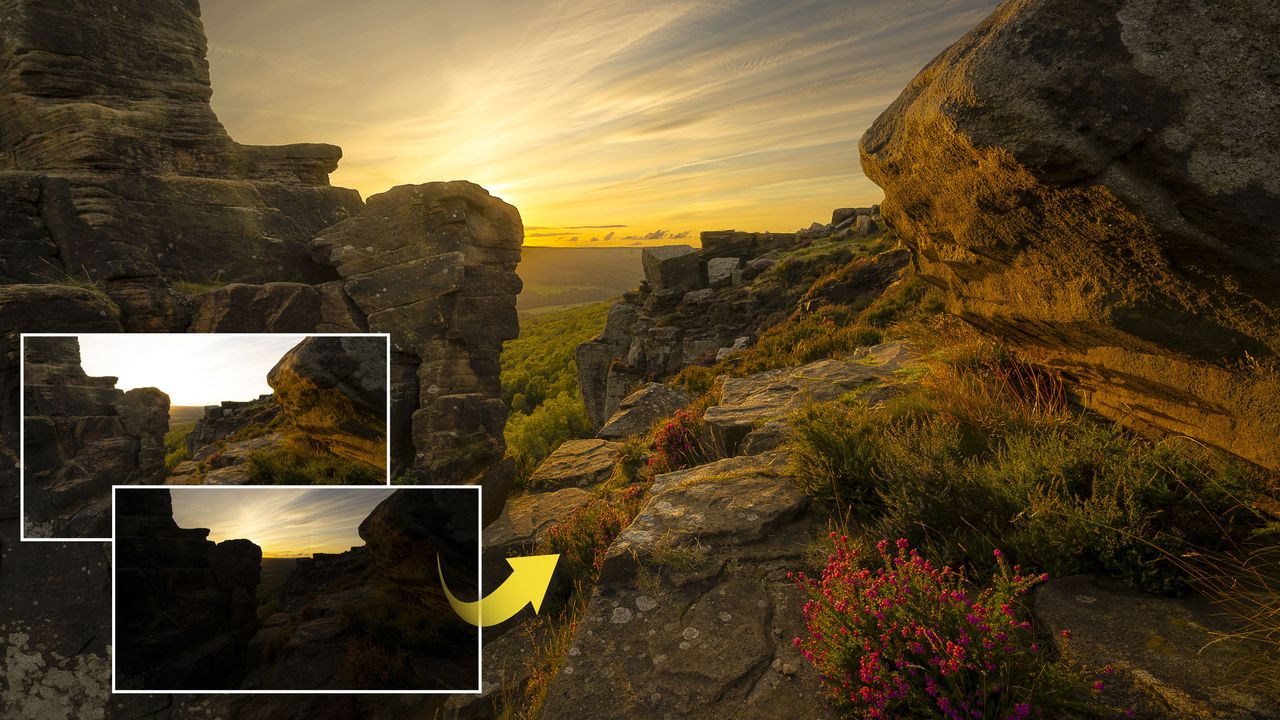
Serif's Affinity Photo editing software offers users a powerful tool called Live Masks to help balance landscape exposures. When shooting towards the sun during sunset, photographers often face the challenge of balancing sky and land exposures. To address this, it's common to capture a series of bracketed exposures, which can then be merged, blended, or selected to achieve the desired results.
Live Masks in Affinity Photo can be particularly useful in this scenario. There are three types of Live Masks available: Hue, Luminosity, and Band-pass. These masks allow users to blend layers based on various parameters. In this case, Luminosity masks are used to blend light and dark pixels from two layers, providing precise control over the exposure blending process.
To use Live Masks effectively, start by aligning the images in Affinity Photo. Open the images using File > New Stack and select Auto-align. Remove the stacked group and the aligned images. Next, add a Live Mask by Alt-clicking the Layer Mask icon and selecting Luminosity Range Mask. Adjust the line to determine the tonal range transparency, and fine-tune the blend by adjusting the line's steepness and applying a Blur Radius to soften edges.
To enhance the brightness of foreground elements like flowers, apply an HSL Adjustment and increase the Saturation. Use the Hue Range Mask to isolate specific colors, such as the purple flowers, and fine-tune their appearance. Finally, use the Clone Stamp tool to remove any unwanted haloes around the edges, ensuring a clean and balanced composite image. Experiment with the technique using provided sample images, and download them to practice this method.
Written by urgent.news from Digital Camera World's reporting — not their text. Machine-written — may contain errors; check the original before relying on it.